LWIP IP Stack Example Design
Critical Link has created an example of the MitySOM-C10L sending and receiving UDP/TCP Echo packets using the LWIP IP stack. The performance of the UDP throughput testing done was ~1MB/s when the dcache and icache were increased to a value of 65536 from 4096. The NIOS running the LWIP stack is the bottleneck limiting the throughput in this example, which is why the dcache/icache was increase to 64K to help increase performance.
The SLL HyperRAM Memory is mandatory for this example to build properly. Please visit xSPI Memory Controller IP to request a download for the IP to use in the design. Once the IP is obtained, it can be extracted into the ip folder such as mitysom-c10l-ref/C10L-7Q-3X3-RI_LWIP/ip/20230420_SLL-CL_MBMC-v3_2_15-RD-24hr-NIC (Note: SLL IP name subject to change).
Getting Started
The examples are designed to communicate between the C10L and another target such as a PC or SOM. The C10L can act as both a client or a server and interact with the target PC or SOM which can act as a client or server using the provided lwip-examples. The communication protocol used must match between the C10L and target PC or SOM. Note: a JTAG USB Blaster is needed for this example in order to program the C10L.
Below are the steps listed for how to get the UDP/TCP Echo example working within your project. Note: the LWIP Examples are for the 80 KLE FPGA SOM variant only.
- Download and extract the LWIP Example C files for your target here. Included are the C files for the UDP/TCP server and client that can be used to communicate with the C10L.
- Compile the LWIP Example C files on the target device using the provided Makefile by running the command make. Note that the example can be cross compiled for another platform if the appropriate toolchain is sourced first.
cd lwip-examples
make
- If the reference design has not already been downloaded, use the following git command line to fetch the reference design repository from under Linux or within a Nios II Command Shell in Windows. The Reference Design and related documentation can be downloaded via Critical Link's Git Repo here as well: MitySOM-C10L Reference Design
user@linux # git clone git://support.criticallink.com/home/git/mitysom-c10l-ref -b main
- Change to the C10L-7Q-3X3-RI_LWIP project directory.
cd mitysom-c10l-ref/C10L-7Q-3X3-RI_LWIP
- Ensure you have installed the Intel Quartus Prime Standard or Quartus Prime Lite(Free) software on your development computer prior to proceeding. The LWIP IP Stack Example was tested using Quartus version 22.1. For more information, please see the Prerequisites section in MitySOM-C10L_FPGA_Reference_Design.
- Run the command make sof to build the FPGA amd create the SOF file. Please note: depending on your licensing, a time limited SOF (e.g. mitysom_c10l_ref_time_limited.sof) may be generated.
- Run the command make nios to build the Nios
- Ensure that power is on and that the USB Blaster JTAG programmer is properly connected to the Development Kit in J2 before proceeding. Also, make sure that the ethernet cable is connected securely to J5 on the dev-kit board.
- Run the command below to program the SOM with the SOF file built over JTAG.
quartus_pgm -m jtag -o "p;output_files/mitysom_c10l_ref.sof"
- IF a time limited SOF was created, please use the command below instead.
quartus_pgm -m jtag -o "p;output_files/mitysom_c10l_ref_time_limited.sof"
- IF a time limited SOF was created, please use the command below instead.
- Download the software and run the processor after downloading.
nios2-download --go software/mitysom_c10l_ref/mitysom_c10l_ref.elf
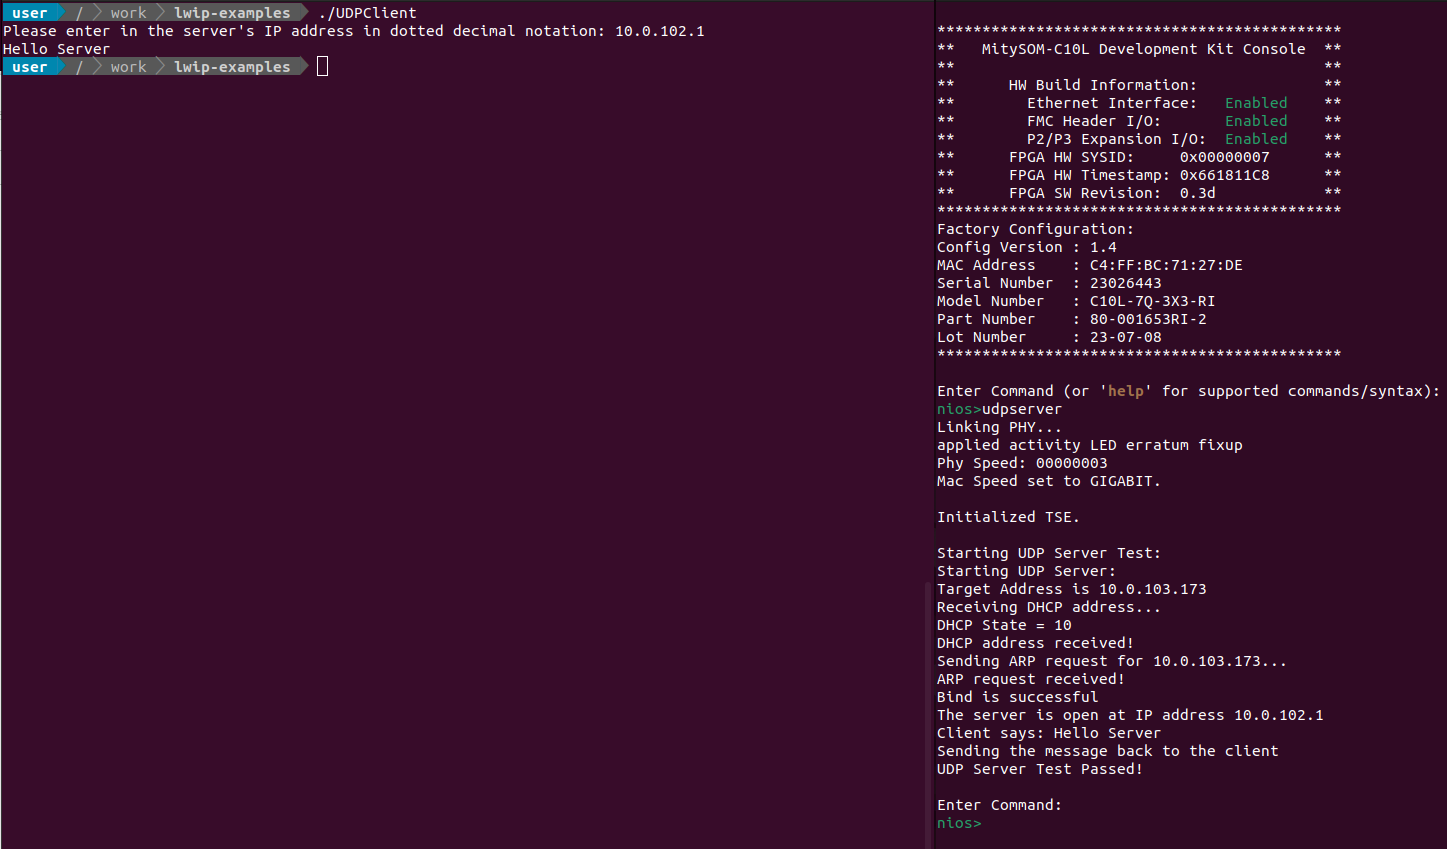
You are now able to run the various UDP/TCP tests. The C10L is able to act as both a client and a server using the respective commands. As indicated in the console, you can see a full list of supported commands by typing help. Pictured below is an example of the udpserver and UDPClient tests on the C10L and target PC respectively.
Description of Files in C10L-7Q-3X3-RI_LWIP
- ping.c & ping.h
- These files are responsible for the ping test only which sends multiple ping packets to a specified target IP address. T
- udp.c & udp.h
- These files are responsible for all the UDP functions such as sending and receiving packets. In addition, a UDP throughput test was created within this file.
- tcp.c & tcp.h
- These files are responsible for all the TCP functions such as establishing the connection between the server and client, sending packets, and receiving packets.
- lwip_core.c & lwip_core.h
- These files are responsible for all the test initialization steps needed in order to properly perform the tests. The main test initialization steps are initializing LWIP, receiving a DHCP address, and receiving an ARP request. In addition, this file also contains the functions to handle received input and sets up the network interface used throughout the testing.
Description of Test Commands
- pingtest <option: set>
- This command sends multiple ping packets to a target specified by the TARGET_ADDRESS MACRO
- (Optional) flag set: The target IP address can be specified by the user
- udptest <option: set>
- This command sends 100, 1500 byte packets to a target specified by the TARGET_ADDRESS MACRO and reports the throughput in bytes/second.
- (Optional) flag set: The target IP address can be specified by the user
- udpclient <option: set>
- This command sends a packet to a target or UDP server specified by the TARGET_ADDRESS MACRO
- (Optional) flag set: The target IP address can be specified by the user
- udpserver
- This command creates a UDP server and reports the IP address of the server
- tcpclient <option: set>
- This command sends a packet to a target or TCP server specified by the TARGET_ADDRESS MACRO
- (Optional) flag set: The target IP address can be specified by the user
- tcpserver
- This command creates a TCP server and reports the IP address of the server
If you would like to change the IP address of the target to your target’s IP address within the code, please go change the TARGET_ADDRESS MACRO to the target's IP address in the file software/mitysom_c10l_ref/lwip_core.h, recreate the SOF & JIC file, and reprogram the SOM. The TARGET_ADDRESS MACRO is the default target IP address used without the set option.
// This IP Address should be your target's/PC's IP Address
#define TARGET_ADDRESS "10.0.103.173"