Programming the FPGA
Added by John Mladenik almost 16 years ago
We are using the MityDSP-L138. Our software guys are not able to program my FPGA bin file using your routine. Your routine only programs the bin file that you provided and does not seem to light the green LED for the BIN file I provide them. I can program the BIT file no problem though the FPGA JTAG cable programmer. Do you have any idea what could cause this? I am uploading my bin file in case you have a chance to see if you can program it.
thanks
John Mladenik
| controller_top.bin (453 KB) controller_top.bin |
Replies (4)
RE: Programming the FPGA - Added by Mike Pilawa almost 16 years ago
Hi John.
Would you be able to upload the .BGN .CFI & .PRM files that go with the .BIN file you have already uploaded? These are report files that get generated with the .BIT and .BIN files. I suspect there is a problem with a setting for generating one of these two files.
- Mike PilawaRE: Programming the FPGA - Added by John Mladenik almost 16 years ago
Here is the .BGN but there were no .CFI or .PRM files in the FPGA directory.
| controller_top.bgn (10.6 KB) controller_top.bgn |
RE: Programming the FPGA - Added by Mike Pilawa almost 16 years ago
Hi John.
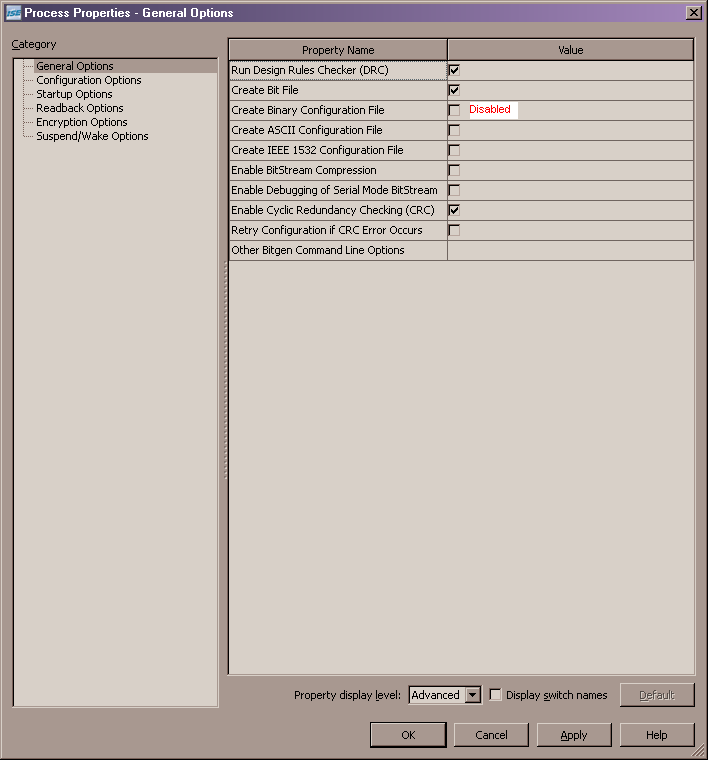
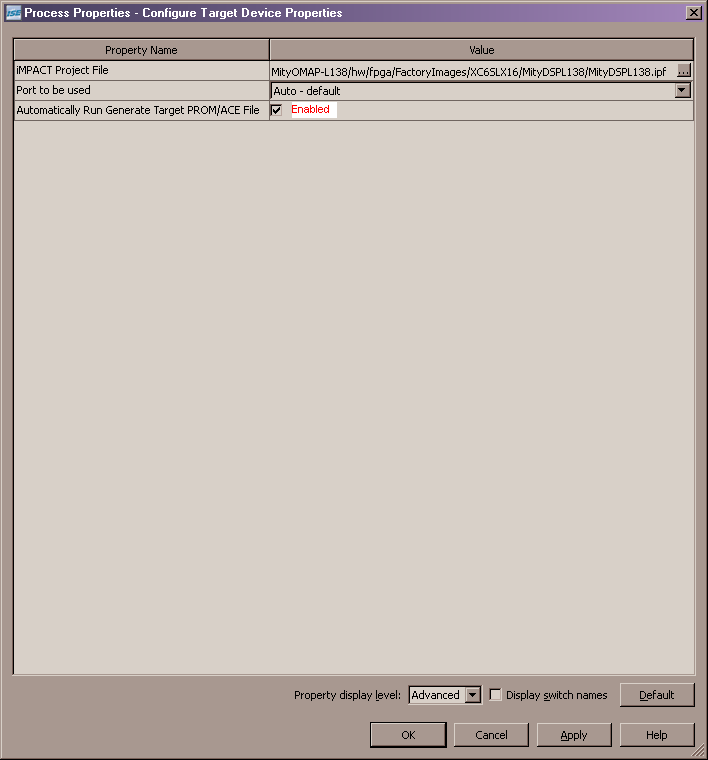
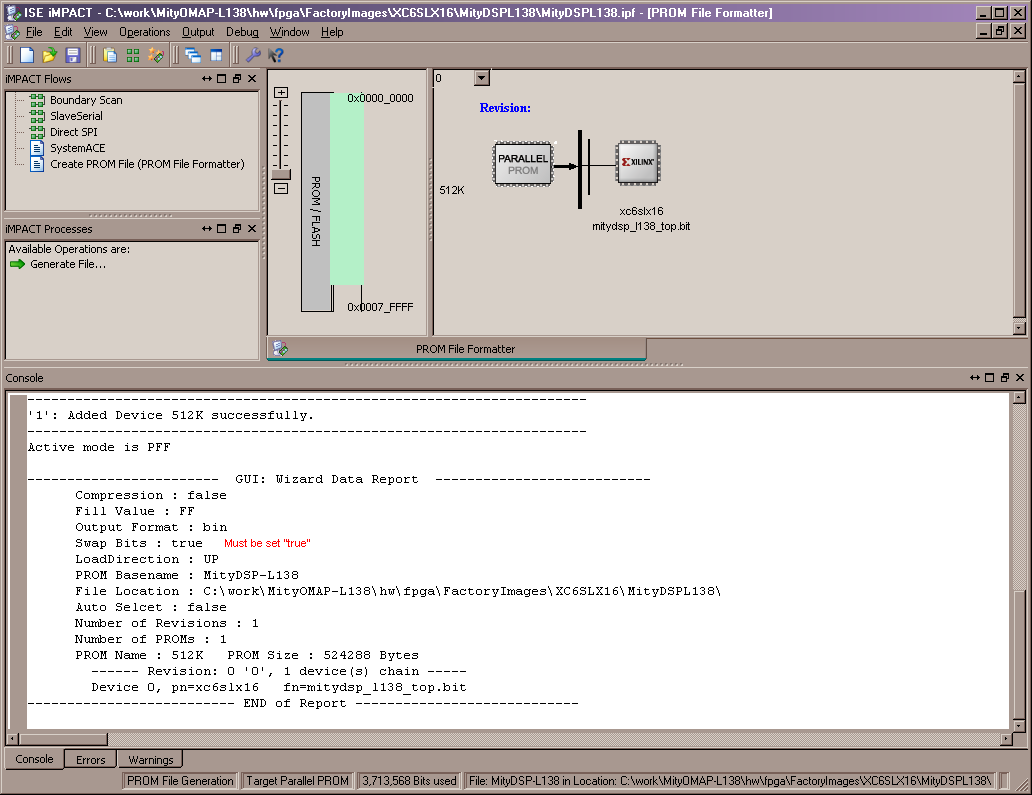
It looks like you are generating the .BIN file using the bitgen tool ("Generate Programming File" step in ISE), instead of the required iMPACT tool method. While the bitgen tool does in fact generate a .BIN file, it doesn't have the options available to generate it in the correct format we need to store and load it on the MityDSP platform. It comes down to one option "SwapBits" that needs to be enabled. Otherwise, all bytes in the file have their bits in reverse order.
I am attaching an .IPF file (iMPACT Project File) from our factory image FPGA, which you probably already have. You should first take a copy of this file and rename it for your own project. Then point ISE to it in properties of "Configure Target Device". Also make sure that the "Automatically Run Generate..." option is enabled. Next, you'll need to open up the file with "Manage Configuration Project (iMPACT)", and make two changes. The first is to right-click on the "xc6slx16" device and "Assign New Configuration File", pointing it at your own .BIT file. The second is to change the output file name by clicking Edit->"Rename PROM File", and setting your own output .BIN file name and location. After saving the iMPACT project file and closing it, you should be able to automatically generate the correct format .BIN file by running "Generate Target PROM/ACE File" (under "Configure Target Device") in ISE.
I am also attaching some screen shots that should help guide you.
Just reply back if you are still having trouble after this.
- Mike PilawaRE: Programming the FPGA - Added by Anatoly Ivanov about 12 years ago
Or, you can simply try this (It has been checked on L138F and slx45, just remove -b option):
http://www.xilinx.com/support/answers/35686.htm
BIN by bitgen is a non-byte-swapped file, the Sync Wordis read as "AA 99 55 66".
In older iMPACT versions, the generated BIN file by default is byte swapped. The Sync Word is "55 99 AA 66" in it.
In serial configuration by MCU, a non-byte-swapped BIN should be used; if the configuration mode is parallel/selectMAP, where Xilinx requires D0 be the most significant bit, you should use a byte-swapped BIN file.
The batch command to generate a BIN file is as below:
promgen -w [-b] -p bin -u 0 xxx.bit -o xxx.bin
Option -b stands for disabling byte swapping. If a byte-swapped Bin file is needed, remove the -b option.

