Using embedded Qt with QtCreator
The purpose of this page is to describe setting up a kit with QtCreator to target the ARM toolchain. These directions assume you have already installed the poky toolchain that you built and QtCreator.
Launching QtCreator
From the command line, source the poky toolchain and launch QtCreator:
. /opt/poky/2.1.1/environment-setup-cortexa9hf-neon-poky-linux-gnueabi
qtcreator &
QtCreator will always need to be launched after sourcing the environment to ensure all of the expected environment variables are set up.
Creating the Kit
From the main window, go to the “Tools -> Options”
Under Build & Run, go to the Compilers tab:
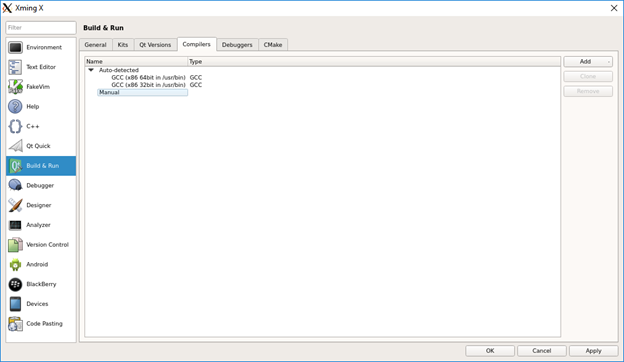
Click Add and select GCC. For the “Compiler path,” navigate to the x86_64 sysroot. “/opt/poky/2.1.1/sysroots/x86_64-pokysdk-linux/usr/bin/arm-poky-linux-gnueabi/arm-poky-linux-gnueabi-g++”
You should see the ABI selects “arm-linux-generic-elf-32bit”
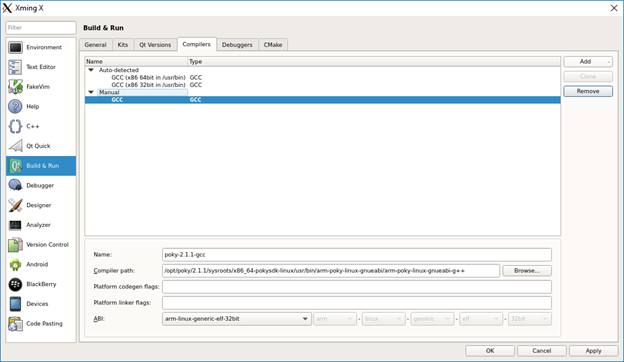
Name it appropriately and click “Apply.” Remember the name as it will be used later to make the Kit.
Go to the “Debuggers” tab.
Add the gdb at the same location “/opt/poky/2.1.1/sysroots/x86_64-pokysdk-linux/usr/bin/arm-poky-linux-gnueabi/arm-poky-linux-gnueabi-gdb”:
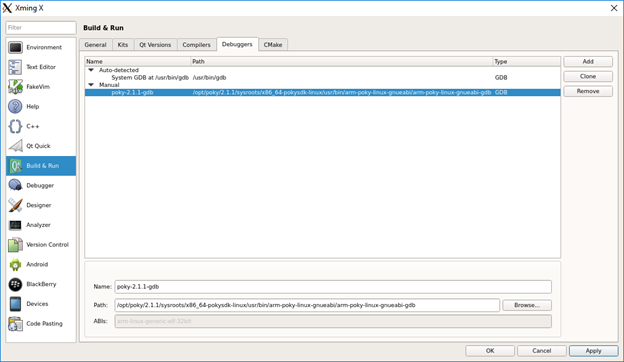
Name it appropriately and click “Apply.” Remember the name as it will be used later to make the Kit.
Go to the “Qt Versions” tab.
Click “Add” and navigate up to the qt5 directory “/opt/poky/2.1.1/sysroots/x86_64-pokysdk-linux/usr/bin/qt5/” and select qmake from there.
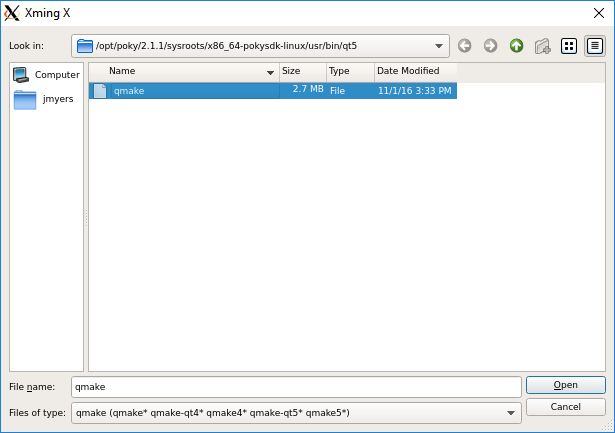
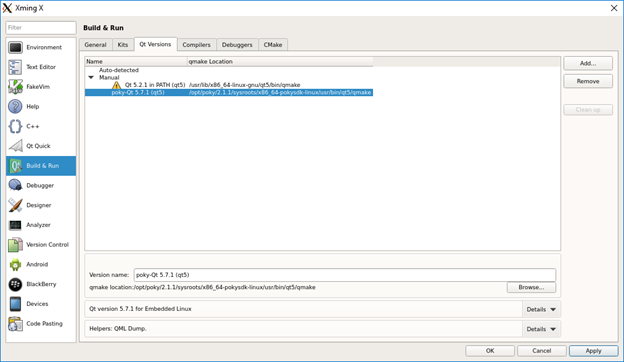
Name it appropriately and click “Apply.” Remember the name as it will be used later to make the Kit.
Go to the “Kits” tab.
Add a kit.
For Sysroot, navigate to the “cortexa9hf-neon-poky-linux-gnueabi” location in the installed toolchain.
Select the Compiler, Debugger and Qt version from the previous steps.
Set the mkspec to be “linux-oe-g++”
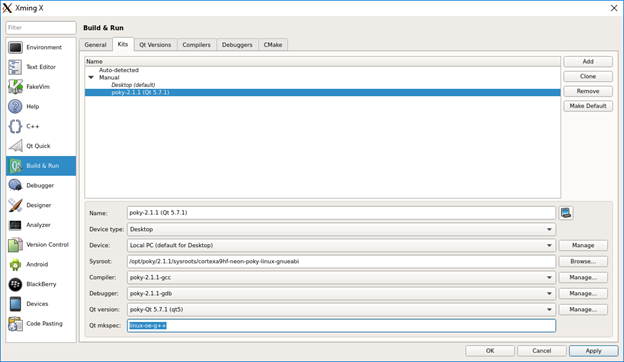
Click “Apply.”
Configuring the Project
With the project open and set as the active project, click “Projects”
Select “Change Kit” and then click on the new kit for the ARM target:
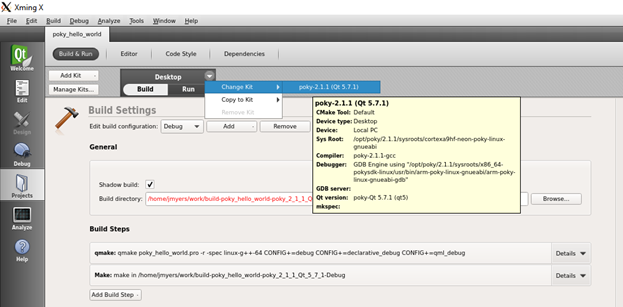
You may have to manually delete the Makefiles out of the build directory before things will compile correctly.
Other Notes
Please note, this did not cover setting up a run target on the ARM. The application binary will have the copied over manually unless you set up the run target and configure the embedded device to receive the executable.
Go to top

