MitySOM-AM62A CSI-2 Camera Capture
The AM62Ax is able to stream image data from a variety MIPI/CSI-2 cameras. The AM62Ax includes hardware accelerated image signal processing (ISP) blocks.
This example outlines examples streaming or capturing image data from a couple of off-the-shelf cameras.
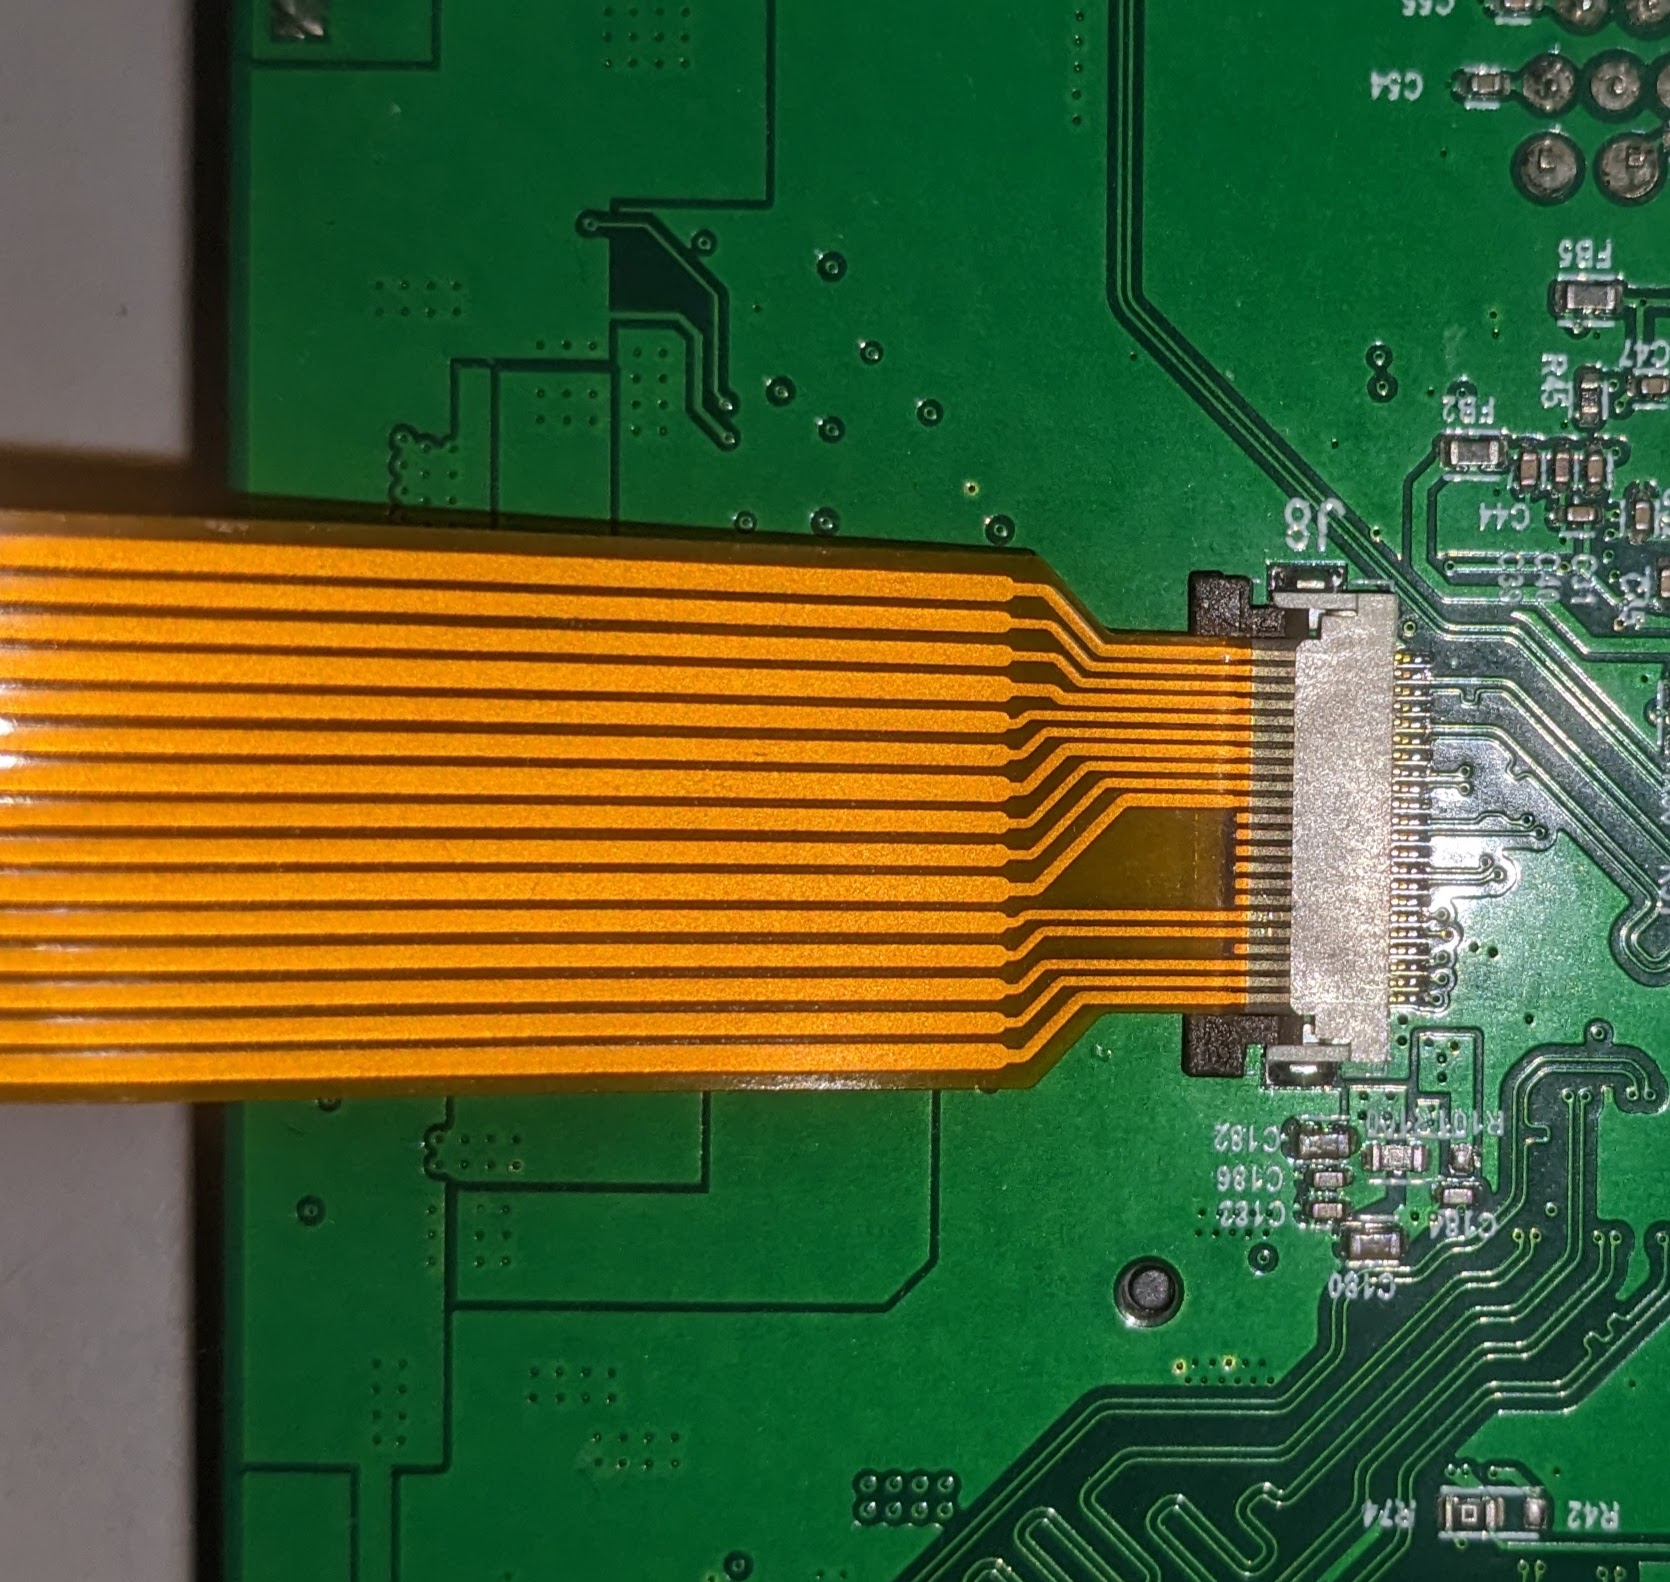
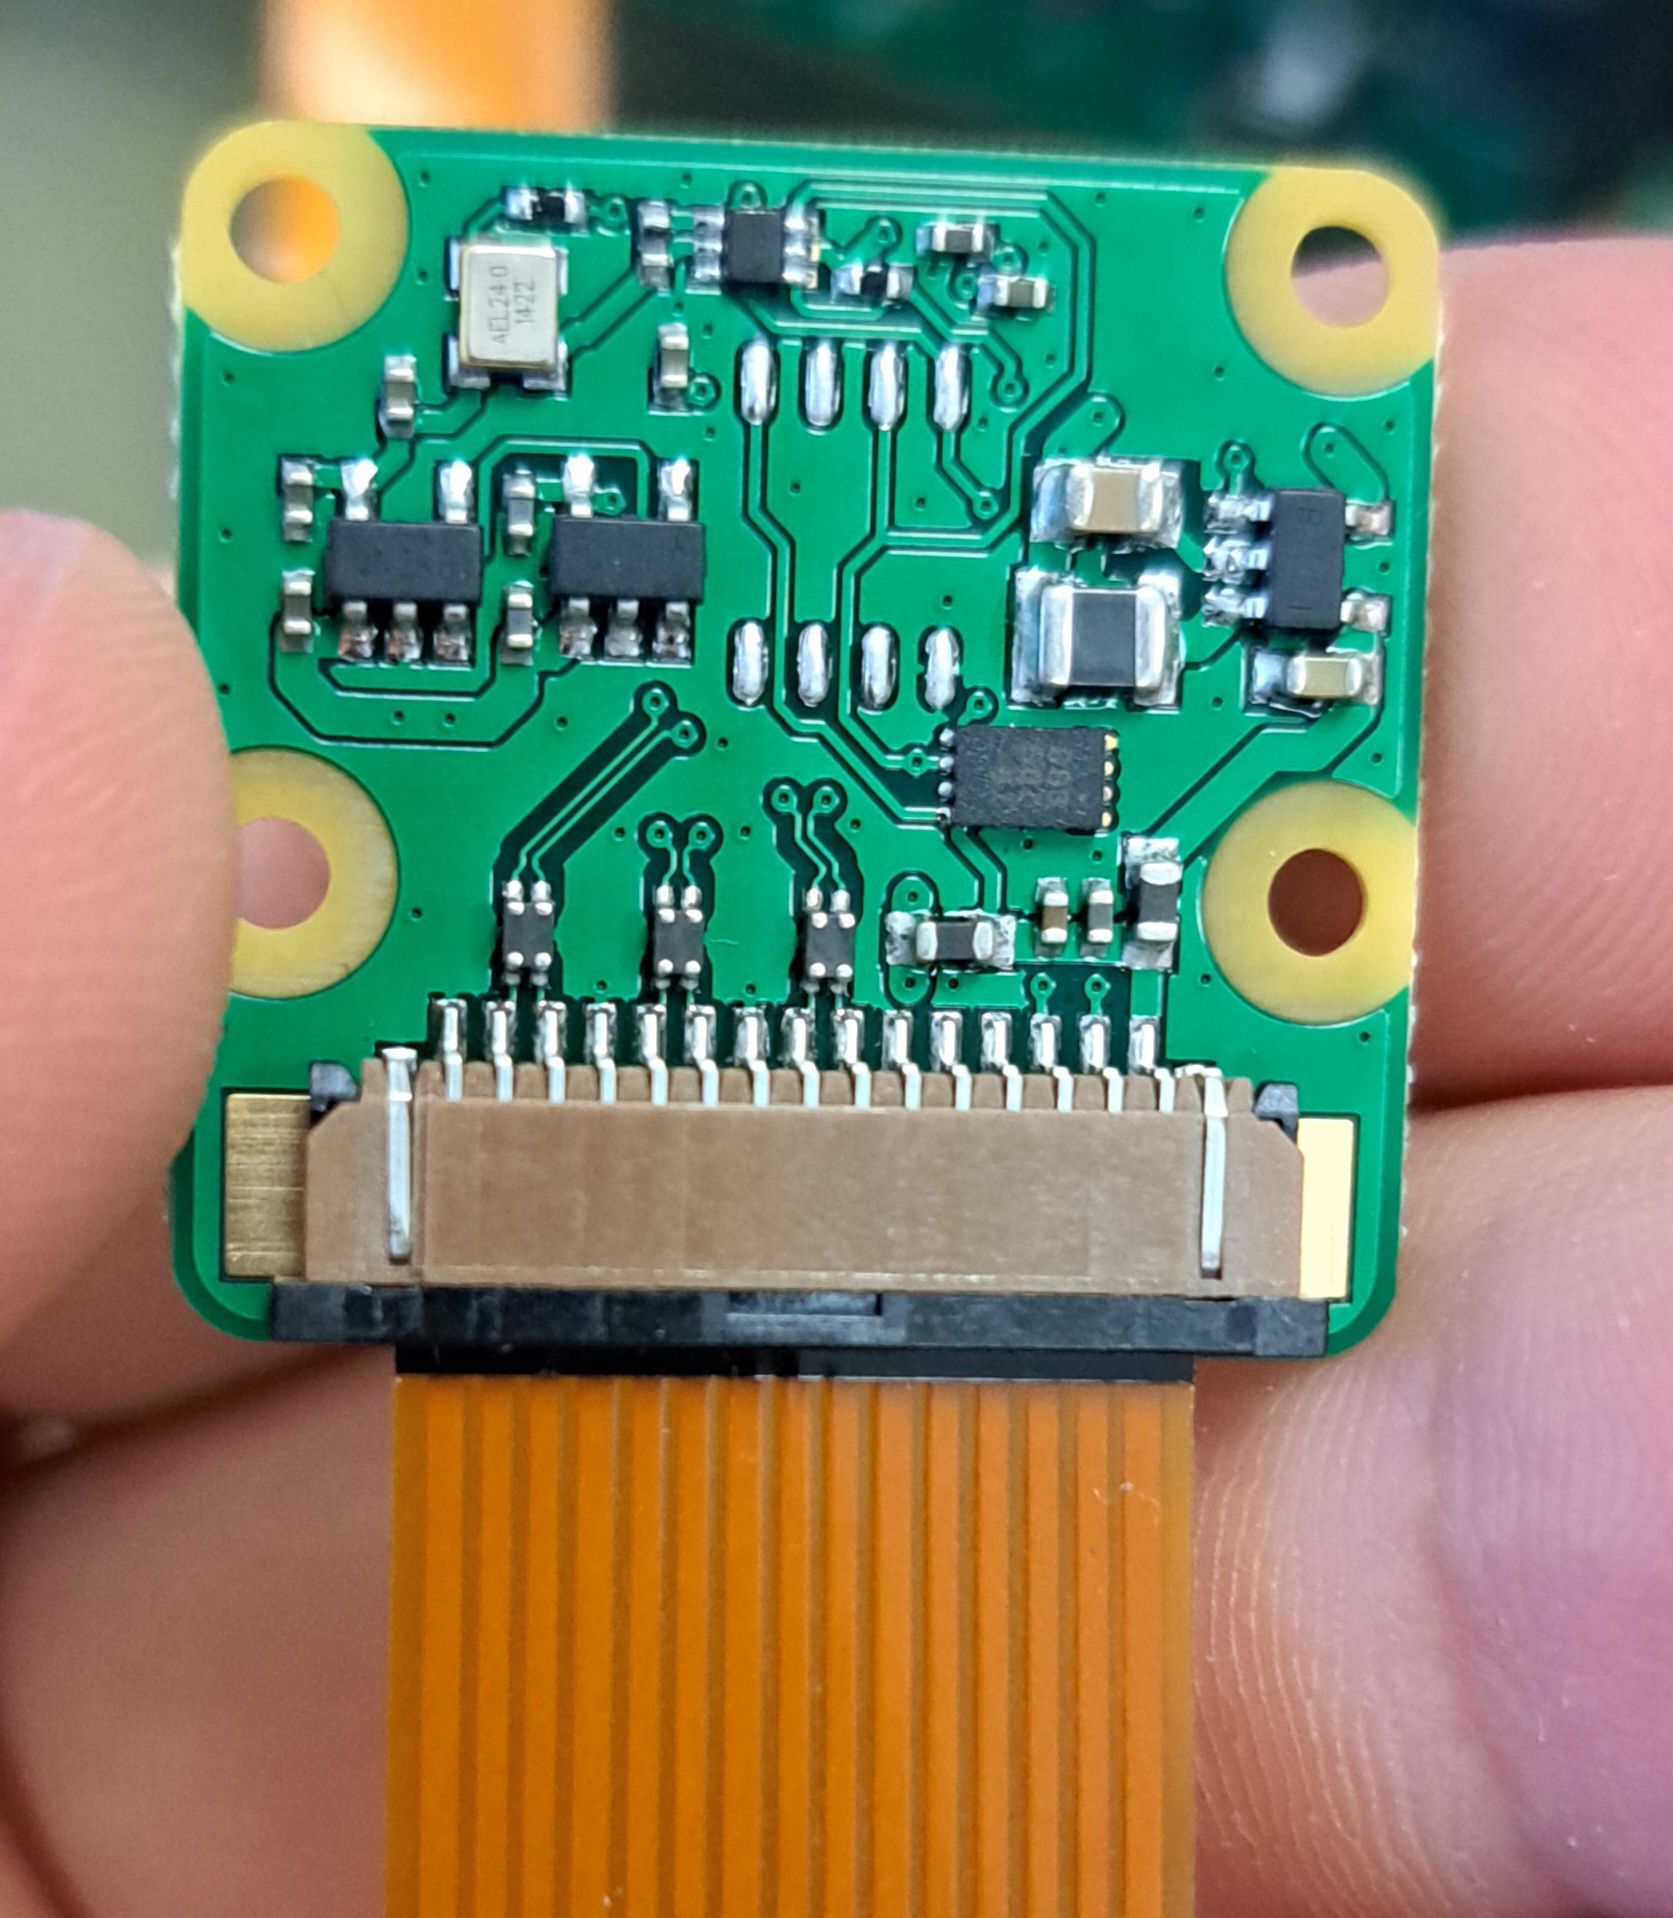
The connector interface on the MitySOM-AM62A Development kit is intended to be compatible with the Raspberry Pi zero 22-pin 0.5 mm pitch interface. Connections for MIPI cameras utilizing the Raspberry Pi 15 pin 1.0mm pitch interface can be made with a 15-pin to 22-pin flex cable adaptor, such as the Arducam Raspberry Pi Camera Cable.
Using a Raspberry Pi 2 Camera
The Raspberry Pi 2 Camera is an 8MP camera based on the imx219 sensor from Sony.
Connect the camera.
The pictures below show the connections for the camera to the development kit using the Arducam adapter cable. Note that the metal conductors must be facing away from the MitySOM-AM62A evaluation board interface.
Configure to use the MitySOM-AM62A Development Kit IMX290 Overlay
Add this line to /run/media/BOOT-mmcblk1p1/uEnv.txt and reboot (note BOOT may be lowercase):name_overlays=k3-am62a7-mitysom-devkit-imx219.dtbo
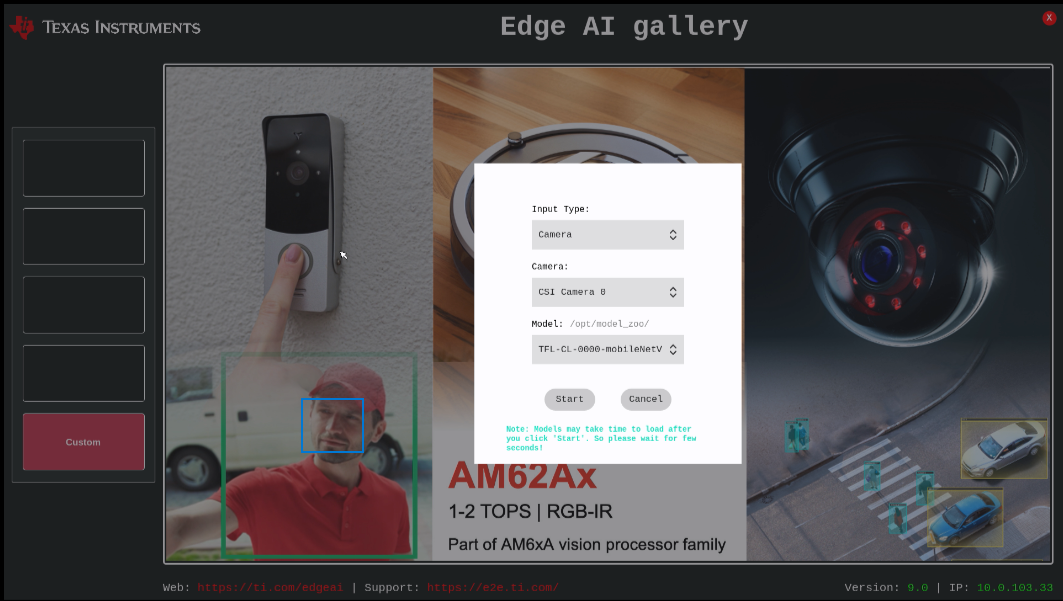
Running the AI Examples
The out of the box Edge AI demo software should be running and visible on the HDMI output port of the development kit. Note: you must use a 1080p monitor to run the edge AI demonstration software. If you connect a mouse to one of the USB-A jacks on the development kit, you can navigate to the "custom" menu option on the lower left. When you click this option, a submenu is presented. Select the camera source and "CSI Camera 0" as the video source and choose the AI model you would like to run and select "start". It will take a few moments for the demonstration to start.
Streaming through HDMI
It is also possible to stream directly from the camera to an hdmi display. Note: To do this you must be using the edgeai image.
Disable edgeai demo and stop weston
systemctl stop edgeai-init
systemctl stop weston.socket && systemctl stop weston
Setup the camera
./scripts/setup_cameras.sh
Stream at 1920x1080
gst-launch-1.0 v4l2src device=/dev/video-rpi-cam0 io-mode=5 ! video/x-bayer,width=1920,height=1080,format=rggb ! \
tiovxisp sensor-name=SENSOR_SONY_IMX219_RPI dcc-isp-file=/opt/imaging/imx219/linear/dcc_viss_1920x1080.bin \
sink_0::dcc-2a-file=/opt/imaging/imx219/linear/dcc_2a_1920x1080.bin sink_0::device=/dev/v4l-rpi-subdev0 ! \
video/x-raw,format=NV12 ! queue ! kmssink driver-name=tidss plane-properties=s,zpos=1
Note: video-rpi-cam0 and v4l-rpi-subdev0 may need to be changed to video-imx219-cam0 and v4l-imx219-subdev0.
Using controls
The IMX219 driver does have V4L2 controls to allow generation of test patterns as well as flipping X and Y on the output:
root@am62axx-evm:/opt/edgeai-gst-apps# v4l2-ctl -L -d /dev/v4l-subdev2

User Controls

                       exposure 0x00980911 (int)    : min=4 max=1759 step=1 default=1600 value=1600
                horizontal_flip 0x00980914 (bool)   : default=0 value=0 flags=modify-layout
                  vertical_flip 0x00980915 (bool)   : default=0 value=0 flags=modify-layout

Image Source Controls

              vertical_blanking 0x009e0901 (int)    : min=4 max=64455 step=1 default=683 value=683
            horizontal_blanking 0x009e0902 (int)    : min=1528 max=1528 step=1 default=1528 value=1528 flags=read-only
                  analogue_gain 0x009e0903 (int)    : min=0 max=232 step=1 default=0 value=0
                red_pixel_value 0x009e0904 (int)    : min=0 max=1023 step=1 default=1023 value=1023
          green_red_pixel_value 0x009e0905 (int)    : min=0 max=1023 step=1 default=1023 value=1023
               blue_pixel_value 0x009e0906 (int)    : min=0 max=1023 step=1 default=1023 value=1023
         green_blue_pixel_value 0x009e0907 (int)    : min=0 max=1023 step=1 default=1023 value=1023

Image Processing Controls

                 link_frequency 0x009f0901 (intmenu): min=0 max=0 default=0 value=0 (456000000 0x1b2e0200) flags=read-only
                                0: 456000000 (0x1b2e0200)
                     pixel_rate 0x009f0902 (int64)  : min=182400000 max=182400000 step=1 default=182400000 value=182400000 flags=read-only
                   test_pattern 0x009f0903 (menu)   : min=0 max=4 default=0 value=0 (Disabled)
                                0: Disabled
                                1: Color Bars
                                2: Solid Color
                                3: Grey Color Bars
                                4: PN9
                   digital_gain 0x009f0905 (int)    : min=256 max=4095 step=1 default=256 value=256
root@mitysom-am62x:~#  v4l2-ctl --set-ctrl=test_pattern=3 -d /dev/v4l-subdev2
root@mitysom-am62x:~#  v4l2-ctl --set-ctrl=horizontal_flip=1 -d /dev/v4l-subdev2